On March 31, 2015 my wife, two daughters and I took stewardship over the historic F. Walter Cox home in Manti, UT. This blog chronicles our progress in reshaping this beautiful structure back to its former glory as a preserved pioneer home built by our ancestors.
The garret is the top level of the F. Walter Cox home where the majority of his children slept. This was converted to an apartment around 20 years ago and the west dormer was added to accommodate a kitchen space. We constructed an east dormer to better suit the bathroom, which until now was cramped with the sloping roof line.
The kitchen as we purchased the home last year. The fridge was located within the nook to the right.
The view looking south into the living room.
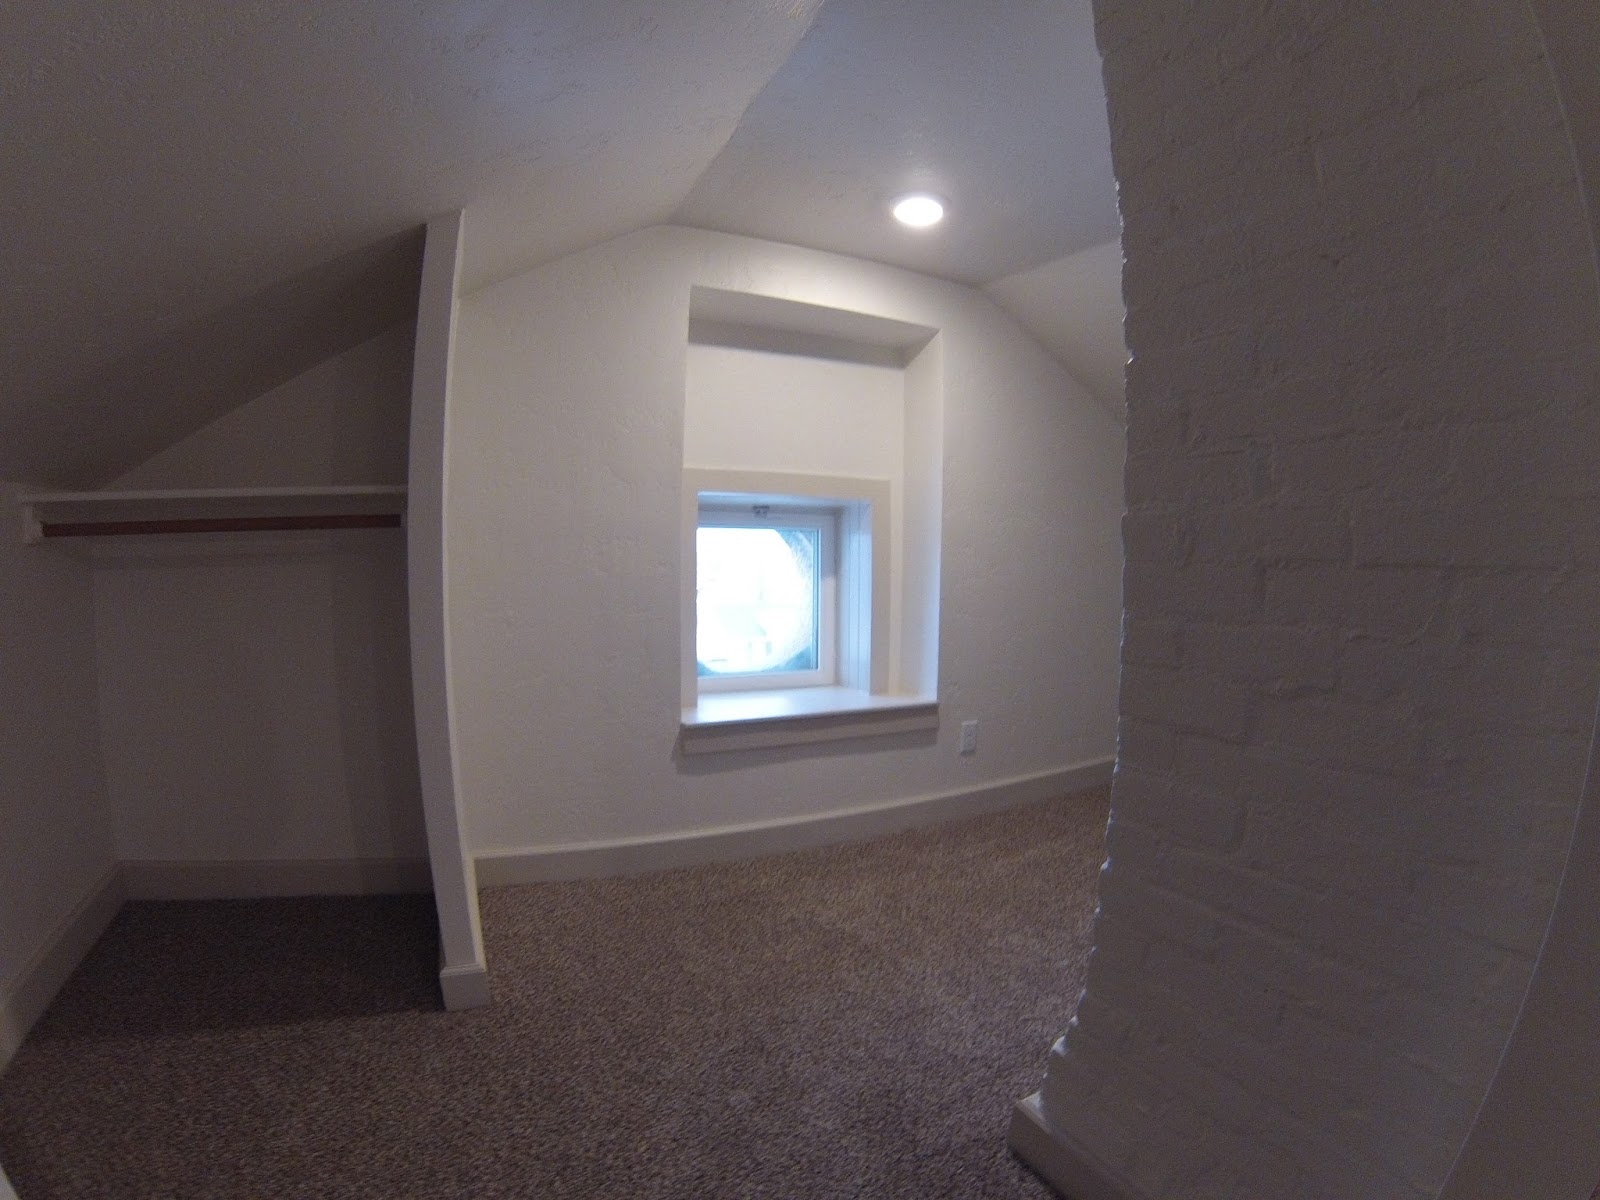
The north bedroom with the famous circle window opening on the left. This is the last brick chimney left in the house. The south chimney was removed when this attic was converted to an apartment.
The main bedroom on the south side of the garret.
Looking north
With limited storage upstairs, we added some recessed storage shelving that extends into the crawl space. Pictured here is the south bedroom.
Jim and Teri cut out the new dormer facing east to provide headroom in the bathroom, as well as natural light and venting.
We decided to integrate the refrigerator into the kitchen space by creating a compartment.
New dormer on the east side.
New kitchen taking shape. Andy Cox and his crew installed new electrical and lighting.
Transforming the nook next to the kitchen into a pantry.
Recessed shelving for the north bedroom.
New laminate kitchen flooring.
To fix a high spot in the living room, I peeled back the subfloor to expose the original pioneer planks. I then used my planer to grind it to a more level setting.
The two girls pulling out carpet pad staples.
New kitchen cabinets being installed by Orson Kimball.
Ben Kimball installed new siding on the west dormer. This angle is looking south.
Basement Living Room (NW corner of house): we pulled the lath and plaster ceiling off to run the new electrical and plumbing for the upstairs kitchen. The insulation was used as a sound deadener when the drywall ceiling was installed.
We also added a support beam to help carry the weight of the kitchen above. Plus we thought it added a rugged look to the room.
In each of the basement rooms, we wanted to expose some of the original stone. We also dug out and exposed the living room window, which until recently was buried under the 1970s concrete porch.
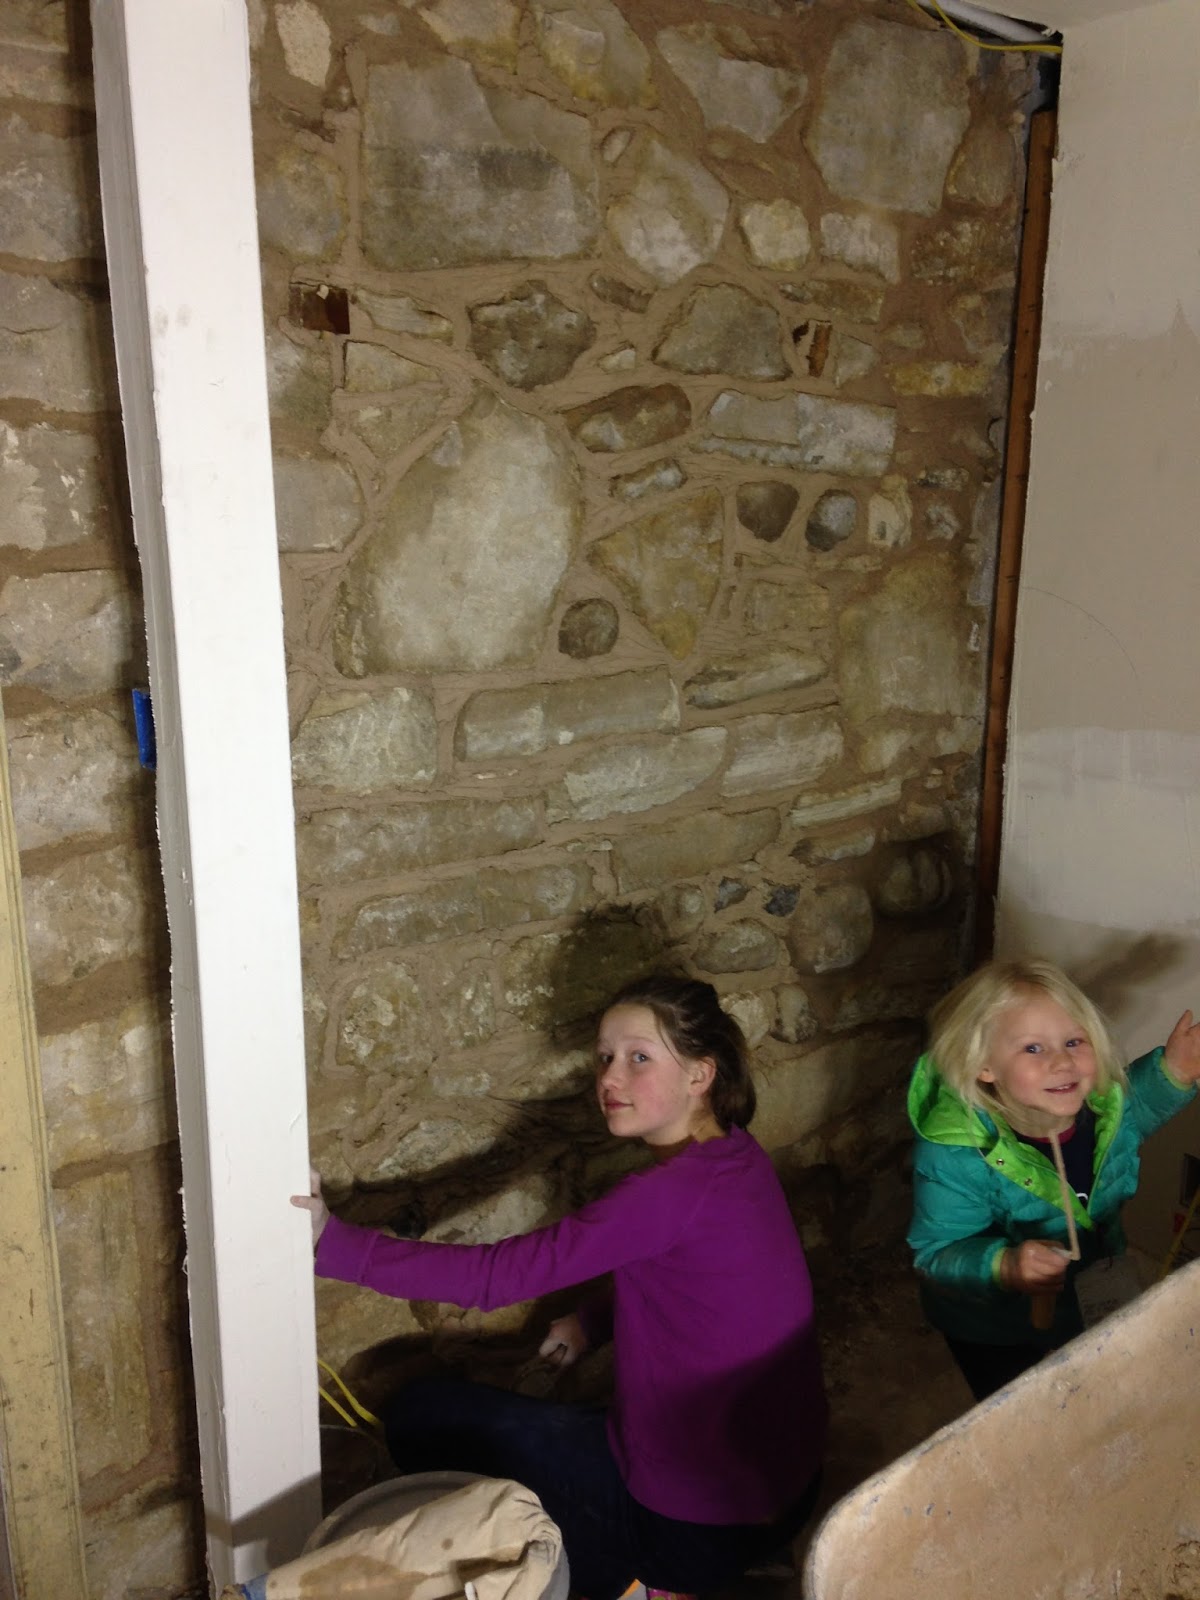
The girls pointing the south rock wall in the living room.
We ended up sheet rocking this west wall as the wall stands at an angle and we wanted to create a clean usable wall space in the living room.
My sweet dad who has given many hours to pointing this old home.
Jim installing the new wood-like tile throughout the basement living room, hallway and kitchen.
Framing in a gas fire place to increase the "wow" factor. :) Jed Hill gave us a great deal on this floor model.
David Jurado, who also cut out the old concrete front porch, boring out a hole for the fireplace exhaust. His bit barely had the length to cut through the nearly 3 foot wall.
The basement stairs needing repair to the dilapidated stone.
I used oolite limestone from around the yard to face the fireplace.
The new window installed in the living room opening. This room hasn't seen natural light like this for several decades.
Jim cutting out the bedroom window. Once we exposed the opening on the outside we were disappointed that the opening was so small, so we cut it deeper to create a larger window.
Digging down the basement bedroom window opening.
Like the other basement rooms, we wanted to expose some of the stone. This south wall was also rumored to have a secret tunnel Walter used to see his much younger 5th wife, next door in the bungalow. No trace of any opening was found.
Lynn Bishop made this supportive window frame out of heavy gage steel to help support the weight of the stone above the window opening.
This is what we found behind the sheetrock. Chipping out all the concrete was a real chore.
Hours of chipping and piles of concrete fragments on the floor.
Now the pointing... Note the large stone protruding at the top. This is visible at the ground level outside and supports the weight of the fireplace above.
Repointing done. It took three different sessions of 2-3 hours each to finish.
Basement bathroom. We decided to expand the bathroom out to the west and south 1 foot so we could fit a bathtub. We also moved the plumbing for the vanity on the east side to the north side. The tiny window was removed to expose the original and much larger window frame.
Both south rooms are raised having stone floors. We pulled up the subfloor and were tempted to point the original floor but because the stones varied on how level they sat, we decided to lay a new wood floor. Both south rooms were originally used for food storage.
Like the other levels of the house, the exterior walls are oolite limestone while the interior walls are river rock (basement) and adobe bricks (upstairs). We ended up floating the river rock with a motor mix. All basement walls were sheet rocked and the ceilings were suspended tile, like an office building. Ridding the suspended ceiling and much of the sheetrock on the walls, greatly enlarged the living space.
Rashel had these sliding barn doors made in Draper and Jim/Teri fortified the doors with the pine.
The new Anderson window, 2.5 times bigger than the window we replaced.
The Basement Kitchen: this was the layout as we purchased the home. No natural light, a ragtag mixture of different cabinets and low suspended ceiling.
The kitchen as we started ripping out the ceiling, adding new plumbing and electrical lines.
A rat's nest of add-on electrics. This was all contained inside a framed-in cabinet above the kitchen table.
From original house diagrams, this opening is now confirmed, not original. We are not sure when this was cut out, but this rough-cut lumber is weight bearing. You can see the river rock and adobe bricks within this massively thick interior wall that divides the living room and kitchen.
Andy Cox reworking the wiring to a new organized panel next door in the utility room.
Rashel and Teri came up with a great solution to expand the kitchen space while not impeding with all the plumbing and electrical to the east in the utility room. We ultimately decided to knock down the north framed wall of the kitchen and push it northward to incorporate the doorway you see here on the left. This is an original doorway and with this now part of the kitchen, a loop through the apartment creates a better flow and feel, less claustrophobic and labyrinthy (is that a word?).
Evidence on the wall (original paint) indicates the original stairway that came down through here from the main level above. The stairs were taken out decades ago to create an apartment living space. We are now using the stairway space above as a food pantry adjacent to our new main level kitchen.
The very talented Jim and Teri installing the new kitchen cabinets. We purchased these through Home Depot and were impressed with the speed of delivery and quality.
We wanted to repurpose the old window that was part of the kitchen from before. However, this time, it will allow natural light. Beyond the window is the original windowed door (one of two remaining original doors to the house) to the utility room.
Kitchen with granite counter tops installed by Accent Interiors and we were very impressed with their service. In fact, we invited them back to do our garret kitchen as well.
See below for the pics of the completed stage:
With the help of many, we finally finished the basement remodel. A special thanks to Lynn Shiffman and my dad for helping us with the final touches.