
We are trying to replicate this early addition which we believe was built in the 1880s or 90s as the first "kitchen" to this home. Many of the original rock homes in the area had similar wood-sided additions that keep the oven heat away from the living spaces; and in the event of a kitchen fire, gave the home a better chance of survival. Before this south addition, the cooking was done in the basement and in the various fireplaces throughout the structure. We plan to use this new space as our master bedroom, bathroom and laundry room.

The first scoop


Crazy to think the pioneers dug the original foundation out by hand. Brent Jensen cleared this hole in a few hours with his handy track hoe.


Brent Jensen using his small excavator to carefully dig around the 163 year old stone foundation.

The entire stone wall, from tippy top to very bottom. Pretty impressive to think how the Cox boys hauled these stones over here from the (temple) quarry.

Clearly visible in this shot are the two door openings. The one on the right, with the header stone, appears to be an original exterior entrance while the opening on the left was dug out for the early wood-sided addition. We plan on using the right opening as a walk-in-closet for the bedroom behind the rock wall. The left opening will be reinforced and used as the entrance into our new addition. The lines coming through the wall are gas and boiler lines in preparation for the new construction.


Interesting soil layers as we dig downward. A lot of clay and river rock. The top several layers are man-made and from the looks of it, dusted with coal.


Dale Christensen pouring the footings

The weather become cold, fast!


Pump truck pouring the foundation walls with heated cement.

Men at work

Pouring foundation walls during the onset of the winter poses challenges as the temperature drops

Albert Parks and his crew pouring the basement floor during one of the last few above freezing days.


Reinforced concrete to cap our fruit room

Buck and Ben installing the plate that will connect the house to the floor joists. The floor will span the full width of the concrete and lie on top of the shorter concrete wall on the left.

It's Groundhog Day and we just received a new shipment of building supplies

Looking west

Ben's dog Sally, one of Devry's best friends and one of the smartest dogs I've ever known.

Devry giving us a power pose


Ben installing the subfloor

Installing the first wall


We like to think ol' Grandpa Walter was smiling down on us. Or, was this technically a frown??

Making use of Lynn Bishop's toys. His crane enabled us to mount the trusses.

All the heavy lifting completed thanks to Lynn Bishop

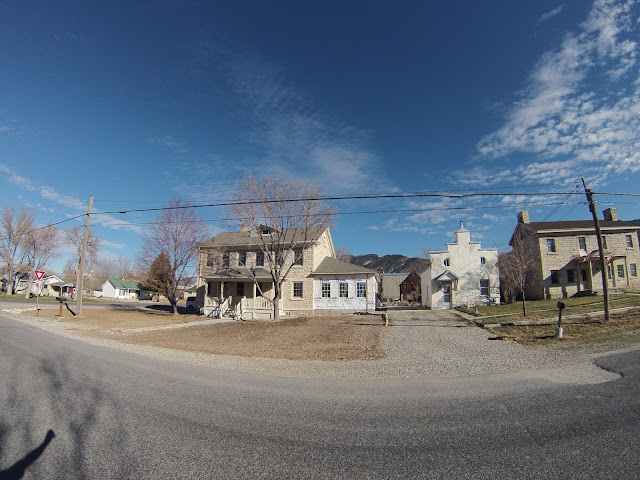
We had a bit of a scare on our way home from church on Sunday 3/5/17. Andy Cox and his son Alex were collecting fast offerings and noticed the Emma Petersen house front door overhang on fire. The wind was horrendous all afternoon as a snow storm blew in from the south. Some embers escaped from the chimney above and started the overhang on fire. The residents, Dave and Kristen, used buckets of water to put it out and I made use of our garden hose until the Manti fire department arrived. Luckily the damage was all external and the fire was quickly extinguished. Had this happened during the night, the damage could have been catastrophic. The fire fighters asked to tour our addition next door to ensure nothing was burning there. It was a close call as we ended up finding a couple dozen burn marks were embers had charred through the floor, see below.


Close call on the addition, a number of burn marks from the fire next door at the Emma Petersen bungalow.


Ben and Orson along with gobs and gobs of wall insulation.


Clint Cox tapping into the sewer line. Talk about a messy job!

Gary spent the better part of a Saturday chipping out the old concrete and face stones to expose the doorways. The doorway on the left will lead into the living room. The doorway on the right will be the entrance to the walk-in closet (bedroom inside the rock wall).


Installing insulation in the basement


Roofing Shingles: Weathered Wood

We extended the roof live over the staircase and thus needed some additional roofing materials.

Roof done and windows being installed

Roofing and windows being installed on the east side


To create a fire barrier to the bungalow next door, we added a layer of 5/8" sheetrock on the south wall and then covered the wall with Tyvek house wrap. The other areas, not layered in sheetrock, were covered with 1/2 foam insulation to not only add a layer of insulation but to also maintain a consistent wall surface for the upcoming wood siding.


A close up of both the foam sheeting next to the Tyvek-wrapped sheetrock.

The final step to prep for the siding was to wrap the foam layer with house wrap.


Rashel and Devry installing the last of the foam layer. As usual, we used every minute of available daylight!


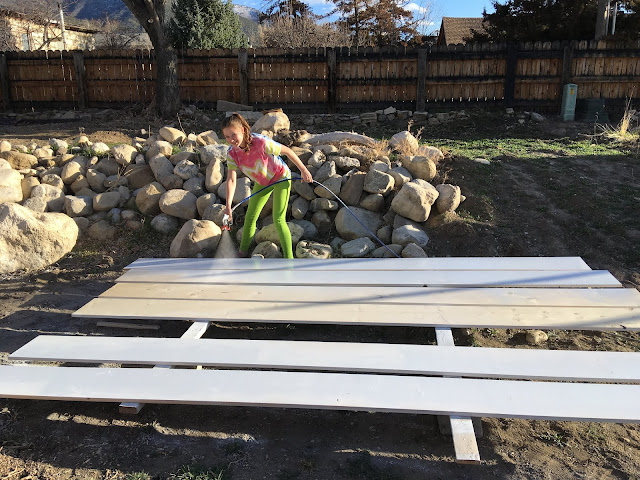
We spread out siding all over the yard so they can be primed before being hung. Ben spent hours milling the pine dutch lap siding in his yard before loading his trailer and hauling it all here. We went with authentic wood siding which is what originally covered the south addition. This type of siding is still found all over older homes around Sanpete.


Ben making good use of his sprayer. We primed like crazy hoping the wood would dry before the freezing night-time temperatures swept through the valley.


Installation of the first piece...


Rashel trying on a layer of London Smoke exterior satin paint. This is the same color used on the exterior doors and dormer. Our hope is to blend in the addition as to not draw too much attention, yet make it look timeless and nice. The trim will be the same color as we used everywhere, a 50/50 mix of Bracken Cream and Bracken Cream Light.


Ben working on the Victorian-style window trim that he hand crafted.

Ben and Rashel working on the window trim on the west wall. With the help of also Madilyn, we managed to paint on a good three coats of paint on the south wall, the most exposed of the addition.

12/20/2017 Taking advantage of an abnormally warm December 20th, we followed Ben as he hung the siding with paint brushes. We managed to get a coat of paint on most of the new siding (east and north walls) before the storm hit at 7pm. Of course we worked the last two hours under headlamps...


Same two windows as above but with some of the added window trim.


Once spring hit, the girls and I primed much of the trim needed to finish the addition exterior.

Ben ordered the necessary bits to mimic the original trim found on the rock house.


Rashel and Devry strike a pose.

Madilyn getting the hang of the sprayer.


Dad filling holes and prepping new trim for paint.

New fascia/crown painted.

New hand-milled trim installed on east gable.


We ordered a custom right-angle gable vent to fit against the 5-12 roof pitch for much needed airflow.

Installing bead-board ceiling. I found these 8' lengths through HomeDepot.com. Sadly, Satterwhite, down the street in Gunnison, no longer carries the aspen bead-board that we used for the front porch. This Home Depot stuff is thinner material but seems to work well. We hope to use a bunch of this stuff on the 2nd story.


Crown added around the new bead-board ceiling.

The cedar shakes adding a nice finished touch to the east gable.


Orson working his magic by installing the cedar shakes to the north gable.

Now, ready for paint and stain!

Love the outcome of the shakes and gable vent!

Our little south addition is really starting to look good!

Installing the first wall


Installing the massive south wall.

We like to think ol' Grandpa Walter was smiling down on us. Or, was this technically a frown??

Making use of Lynn Bishop's toys. His crane enabled us to mount the trusses.

All the heavy lifting completed thanks to Lynn Bishop

We had a bit of a scare on our way home from church on Sunday 3/5/17. Andy Cox and his son Alex were collecting fast offerings and noticed the Emma Petersen house front door overhang on fire. The wind was horrendous all afternoon as a snow storm blew in from the south. Some embers escaped from the chimney above and started the overhang on fire. The residents, Dave and Kristen, used buckets of water to put it out and I made use of our garden hose until the Manti fire department arrived. Luckily the damage was all external and the fire was quickly extinguished. Had this happened during the night, the damage could have been catastrophic. The fire fighters asked to tour our addition next door to ensure nothing was burning there. It was a close call as we ended up finding a couple dozen burn marks were embers had charred through the floor, see below.


Close call on the addition, a number of burn marks from the fire next door at the Emma Petersen bungalow.


Ben and Orson along with gobs and gobs of wall insulation.

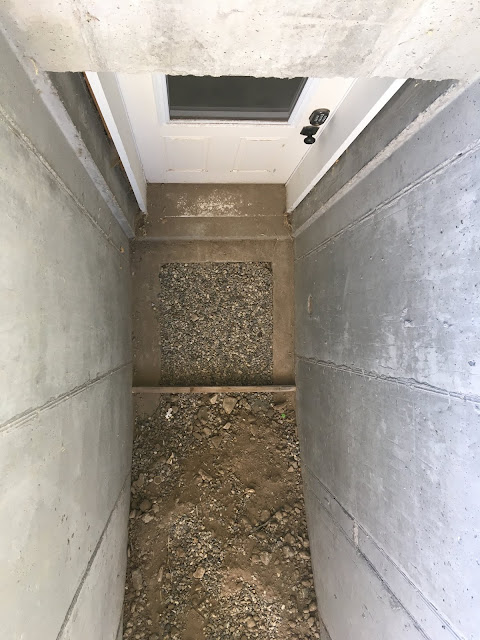
Ben building the overhang to cover the staircase leading to the basement.

Clint Cox tapping into the sewer line. Talk about a messy job!

Gary spent the better part of a Saturday chipping out the old concrete and face stones to expose the doorways. The doorway on the left will lead into the living room. The doorway on the right will be the entrance to the walk-in closet (bedroom inside the rock wall).

And yes, more pointing is needed. Sweet!

Installing insulation in the basement


Roofing Shingles: Weathered Wood

We extended the roof live over the staircase and thus needed some additional roofing materials.

Roof done and windows being installed

Roofing and windows being installed on the east side

Trenching for underground power and irrigation.

The visible overhead power lines will soon be buried 3' underground.

To create a fire barrier to the bungalow next door, we added a layer of 5/8" sheetrock on the south wall and then covered the wall with Tyvek house wrap. The other areas, not layered in sheetrock, were covered with 1/2 foam insulation to not only add a layer of insulation but to also maintain a consistent wall surface for the upcoming wood siding.


A close up of both the foam sheeting next to the Tyvek-wrapped sheetrock.

The final step to prep for the siding was to wrap the foam layer with house wrap.


Rashel and Devry installing the last of the foam layer. As usual, we used every minute of available daylight!


Ready for siding!

We spread out siding all over the yard so they can be primed before being hung. Ben spent hours milling the pine dutch lap siding in his yard before loading his trailer and hauling it all here. We went with authentic wood siding which is what originally covered the south addition. This type of siding is still found all over older homes around Sanpete.


Ben making good use of his sprayer. We primed like crazy hoping the wood would dry before the freezing night-time temperatures swept through the valley.


Installation of the first piece...


Rashel trying on a layer of London Smoke exterior satin paint. This is the same color used on the exterior doors and dormer. Our hope is to blend in the addition as to not draw too much attention, yet make it look timeless and nice. The trim will be the same color as we used everywhere, a 50/50 mix of Bracken Cream and Bracken Cream Light.


Ben working on the Victorian-style window trim that he hand crafted.

Ben and Rashel working on the window trim on the west wall. With the help of also Madilyn, we managed to paint on a good three coats of paint on the south wall, the most exposed of the addition.

12/20/2017 Taking advantage of an abnormally warm December 20th, we followed Ben as he hung the siding with paint brushes. We managed to get a coat of paint on most of the new siding (east and north walls) before the storm hit at 7pm. Of course we worked the last two hours under headlamps...

This photo was taken 12/21/2017, where we ended up the night before . . . as the first snow storm rolled in.

Same two windows as above but with some of the added window trim.

These are the three windows facing west with complete trim and paint. Now, we need to touch up the London Smoke color (siding) around the newly added trim. We took inspiration for the look of this trim from the neighboring Albert & Lucia Cox Tuttle house as well as the Manti historic city hall. Lucia is the youngest daughter of FWC and Emeline.

Manti Historic City Hall, constructed 1873-1882, was an influence in our window trim design.


Once spring hit, the girls and I primed much of the trim needed to finish the addition exterior.

Ben ordered the necessary bits to mimic the original trim found on the rock house.


Rashel and Devry strike a pose.

Madilyn getting the hang of the sprayer.


We painted A LOT of trim!

Dad filling holes and prepping new trim for paint.

New fascia/crown painted.

New hand-milled trim installed on east gable.


We ordered a custom right-angle gable vent to fit against the 5-12 roof pitch for much needed airflow.

Installing bead-board ceiling. I found these 8' lengths through HomeDepot.com. Sadly, Satterwhite, down the street in Gunnison, no longer carries the aspen bead-board that we used for the front porch. This Home Depot stuff is thinner material but seems to work well. We hope to use a bunch of this stuff on the 2nd story.


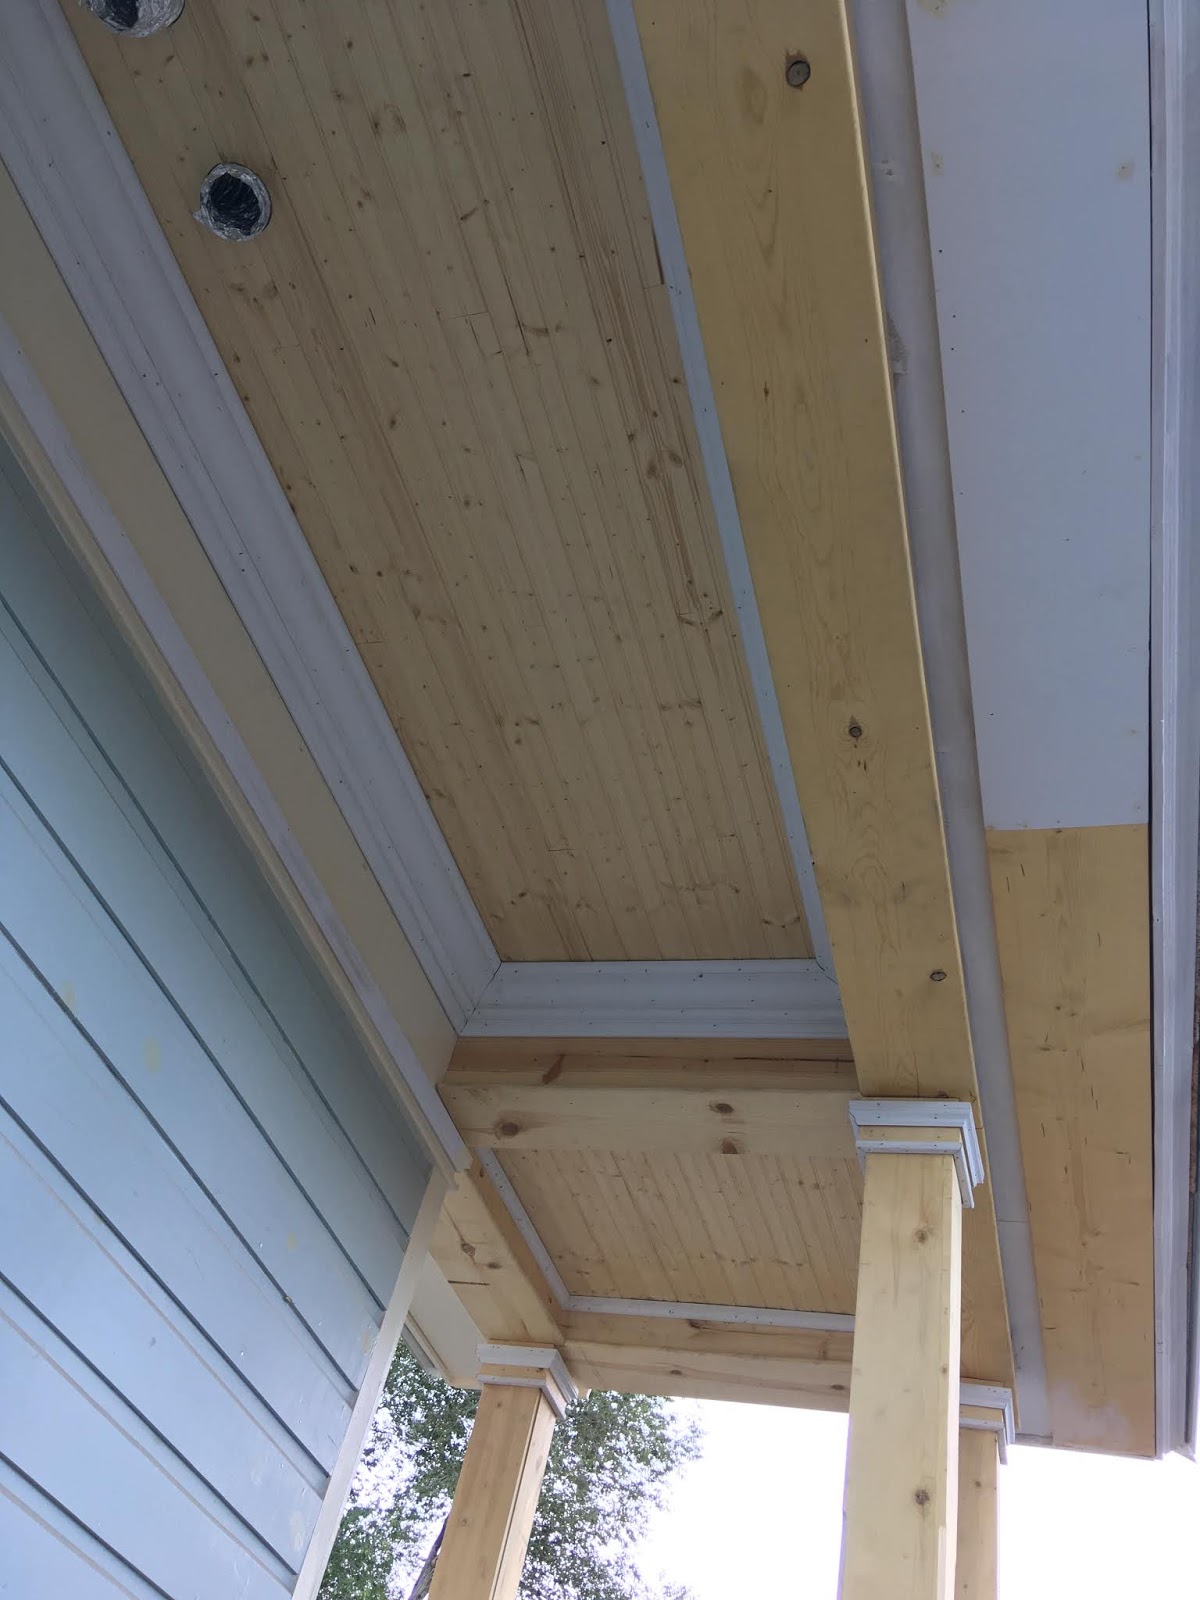
Crown added around the new bead-board ceiling.

The cedar shakes adding a nice finished touch to the east gable.


Orson working his magic by installing the cedar shakes to the north gable.

Now, ready for paint and stain!

Love the outcome of the shakes and gable vent!

Our little south addition is really starting to look good!

Starting on the addition basement staircase.
Divine providence led a descendant of FW Cox to discover the fire while on the Lord's errand. Pretty awesome.
ReplyDelete